When you walk into an event and see a massive, wraparound visual display, it usually is not coming from a single projector. You are seeing multiple projectors blended into one seamless image. Edge blending is the technique that makes this possible, and it is the backbone of the large, immersive canvases that captivate audiences at concerts, trade shows, brand activations, and immersive art installations.
In this guide, we explain what edge blending is, why teams use it, the tools Lumen and Forge relies on, and where multi-projector setups shine. Whether you are an AV pro, an event producer, or a brand team planning a showpiece moment, this will help you understand how we turn big ideas into one unified picture.

Why Use Multiple Projectors
A single projector has limits in image size, brightness, and resolution. Large rooms, tall walls, curved surfaces, and 360-degree environments push past those limits. By combining projectors, we extend coverage, add pixels, and increase light output so visuals hold up at scale.
Enormous Image Size. Through edge blending, visuals can extend far beyond the limits of a single projector. By combining just two or three units, you can create an ultra-wide panoramic backdrop that transforms a stage or venue. Expanding further, a ring of projectors can seamlessly cover 360° walls or even an entire dome ceiling, immersing guests in a fully enveloping environment. This technique allows for breathtaking scale, whether for concerts, brand activations, or immersive exhibitions, ensuring audiences feel not just present, but part of the experience.
Higher Resolution. By tiling multiple projectors, you effectively increase the total pixel count across the display surface. This allows you to scale imagery over expansive canvases while maintaining clarity and detail. Starting with high-resolution units such as WUXGA or 4K projectors ensures that even on very large installations, fine details remain intact. The result is a seamless image where viewers, even at close range, experience sharp visuals without noticeable pixelation.
Maximizing Brightness. When multiple images overlap, their light combines, creating a stronger, more vivid display. Through careful edge blending and, when necessary, stacking, you can significantly increase brightness and clarity. This approach harnesses the collective power of multiple projectors, delivering bold visuals that cut through ambient light. Whether in well-lit indoor environments or large-scale outdoor shows, this technique ensures the content stands out with impact and brilliance..
Creative Flexibility. With multi-projector mapping, even the most complex surfaces can be transformed into a seamless canvas. Curved domes, angled facades, tall columns, and long panoramic walls all become fully workable display areas with consistent, uniform coverage. This opens the door to limitless creative expression, allowing content to wrap around architecture, highlight structural features, or completely redefine the shape of a space. The result is an environment where visuals and storytelling are not constrained by flat screens, but instead flow freely across any form.
What Edge Blending Is and How It Works
Edge blending makes multiple projectors behave like one. Instead of obvious seams or double-bright areas where images overlap, we create a transition zone that fades one image out while the neighbor fades in. The audience should not be able to tell where one projector ends and the next begins.
Here is what happens behind the scenes:
Planned overlaps. We design intentional overlap zones, often 15 to 33 percent of each image. These are the areas where blending takes place.
Soft-edge masks. Using projector tools or media server software, we apply a graduated dimming curve in the overlap so brightness stays even across the full canvas.
Color and gamma matching. No two projectors look identical out of the box. We calibrate white point, color balance, and gamma so a white from one unit matches a white from the next. As content moves across a blend, it does not shift in hue or contrast.
Geometric alignment. Projectors rarely aim perfectly straight, especially on curved or angled surfaces. We use lens shift, physical positioning, and digital warping to align grids and crosshatches until pixels land where they should.
Blend curves and black level. The shape of the fade across the overlap matters. We tune blend curves to avoid stripes that look slightly brighter or darker. Since projectors cannot project true black, we use black-level compensation so dark scenes look uniform across the entire image.
Blending vs stacking. Stacking aligns two projectors exactly on top of each other to increase brightness, not size. Blending places images side by side with overlaps to increase the total canvas size. On large shows, we often do both, for example, stacking pairs for brightness on each half of a screen and blending the halves at the center.
Common Challenges and How We Solve Them
Blending Is a Craft
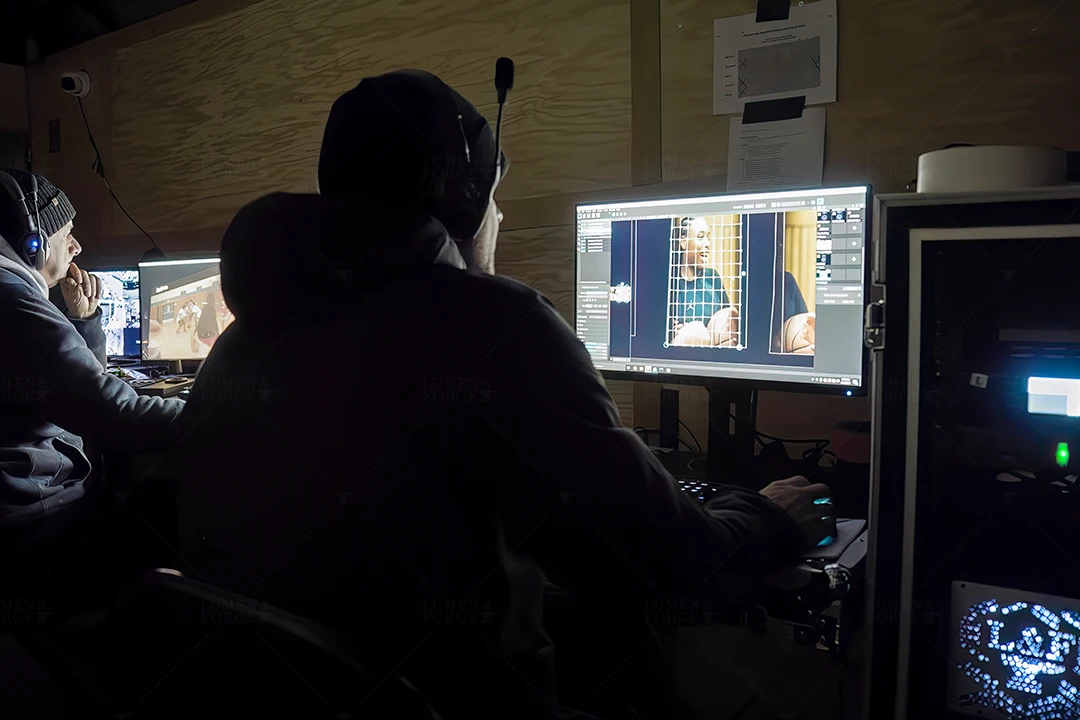
For the audience, the goal is simple pure visual magic. Behind the scenes, however, achieving that magic requires a careful, methodical process. Projector outputs must be aligned with precision, colors balanced, and brightness matched so multiple images merge into a seamless whole. When executed properly, the technical effort disappears, leaving only the wonder of a perfectly unified image.
Precise Mounting and Alignment
Even the smallest errors become magnified where projectors overlap. To ensure seamless joins, we use solid rigging systems, laser alignment tools, and fine-grain warping software that allow us to achieve pixel-perfect accuracy.
Uniform Brightness and Color Over Time
Projector light sources naturally age, and environments can shift. To combat this, we calibrate systems on a regular schedule, and for long-term installations, we employ camera-based auto-alignment that continuously adjusts brightness and color so the system stays locked in.
Content Built for the Canvas
A blended surface requires content designed specifically for its scale and format. Our content team creates visuals with blend zones, aspect ratios, and resolution scaling in mind, ensuring key storytelling elements never get lost in technical seams.
Live-Show Variables
Ambient light, stage haze, and even floor vibration can disrupt a blend in real-world show conditions. We address this by designing with high-contrast imagery, relying on sturdy mounting systems, and planning for fast recalibration procedures to keep the image consistent from rehearsal through final performance.
Immersive Use Cases Where Blending Shines
Multi-projector systems unlock formats that single units cannot touch.
360-degree domes and theaters. A ring of short-throw or standard-throw projectors covers the hemisphere above the audience. Carefully aligned and blended segments create one continuous sky or environment without visible seams.
Immersive rooms and tunnels. All four walls, and sometimes the floor and ceiling, become a canvas. Projectors along each surface blend where wall meets wall, so content flows around the room. Projection tunnels use a series of short-throws blended end-to-end to create motion that follows guests as they walk.
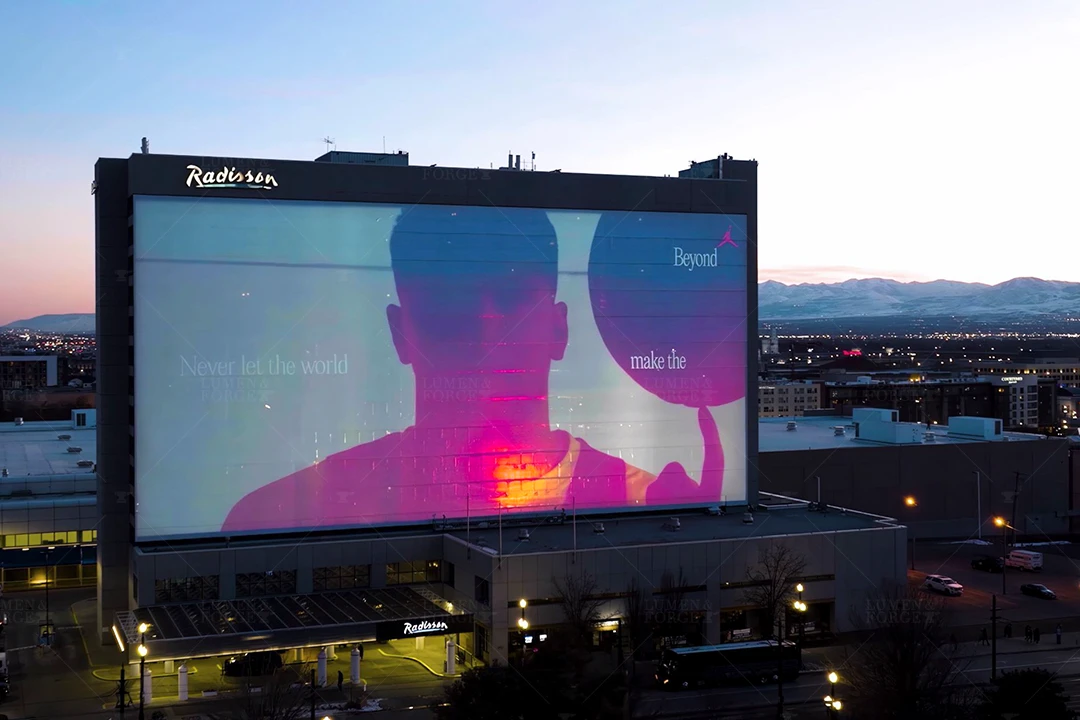
Architectural mapping at scale. Building facades and stadium interiors are divided into zones. Each zone gets a projector, and edges are blended to appear as one animated surface. The result is a single story playing across a very large structure with consistent brightness and color.
Public spaces and permanent art. Long digital murals, tall atriums, and panoramic lobbies come to life by blending multiple projectors edge to edge. When LED is not practical, blended projection delivers the scale and the artistry without visible seams.
360-degree live events. In-the-round concerts and arena shows use arrays of projectors to paint scrims, ceilings, and scenic elements. Blending creates one continuous show layer that supports lighting and staging without calling attention to the tech.
Our Approach at Lumen and Forge
Every successful blend starts with a plan. We scope the geometry, decide on lensing and placement, and pick the toolchain that will serve the creative goals.
Measure first. We capture throw distances, target image sizes, rigging positions, and sightlines. From those numbers, we calculate the required throw ratios and narrow lens options.
Choose the right optics. If a projector must live in a booth or balcony, a long-throw zoom is the move. If it needs to disappear near the surface, we reach for short-throw or ultra-short-throw options. Fixed lenses can offer the cleanest result when geometry is tight and predictable.
Design for brightness and color. Telephoto zoom settings reduce light output. We build lumen budgets that account for lens position, overlaps, and ambient light. On multi-projector arrays, we keep models and lens families consistent to lock in color and brightness uniformity.
Keep people out of the beam. In interactive rooms, guests should never stand in the light path. Short-throw or periscope lenses allow us to keep beams above or below the action. On domes and wraparound rooms, specialty optics reduce shadow risk and keep hardware out of the audience footprint.
Select the right ecosystem. We frequently deploy Panasonic projectors with ET-DLE lenses, Barco bodies with FLD and FLD Plus lenses, and Christie installation lenses for large venues. Each family offers reliable coverage from ultra-short to long throws, backed by service and support. When a concept pushes beyond the catalog, we specify custom or third-party optics that fit the geometry and the story.
A Few Practical Tips
Standardize where you can. Use the same projector model and lens family across an array to simplify calibration and ensure matching performance.
Blend in controlled light when possible. Lower ambient light raises perceived contrast and makes blends cleaner. If the show needs haze for beams, calibrate with haze conditions in mind.
Mind your content resolution. Match total pixel output to your media server and content pipeline. More projectors mean more pixels. Plan storage, playback, and render times accordingly.
Plan a recalibration path. Live shows shift. Heat, vibration, and space usage can nudge alignment. Build in time and tools for quick touch-ups or automated recalibration.
Bring Big Canvases To Life With Confidence
Great projection is designed, not guessed. Share your floor plan, surface dimensions, and creative brief. Our team will run through and lumen calculations, recommend the right lenses and projector family, build a previsualization, and deliver a blend that holds up under show conditions. We handle the full pipeline, from media server programming and color calibration to on site alignment and operator support.
If you are ready to turn a room, a facade, or an entire venue into a single seamless canvas, contact Lumen and Forge. We will make it immersive, reliable, and unforgettable.


